Yard Layout
Overview
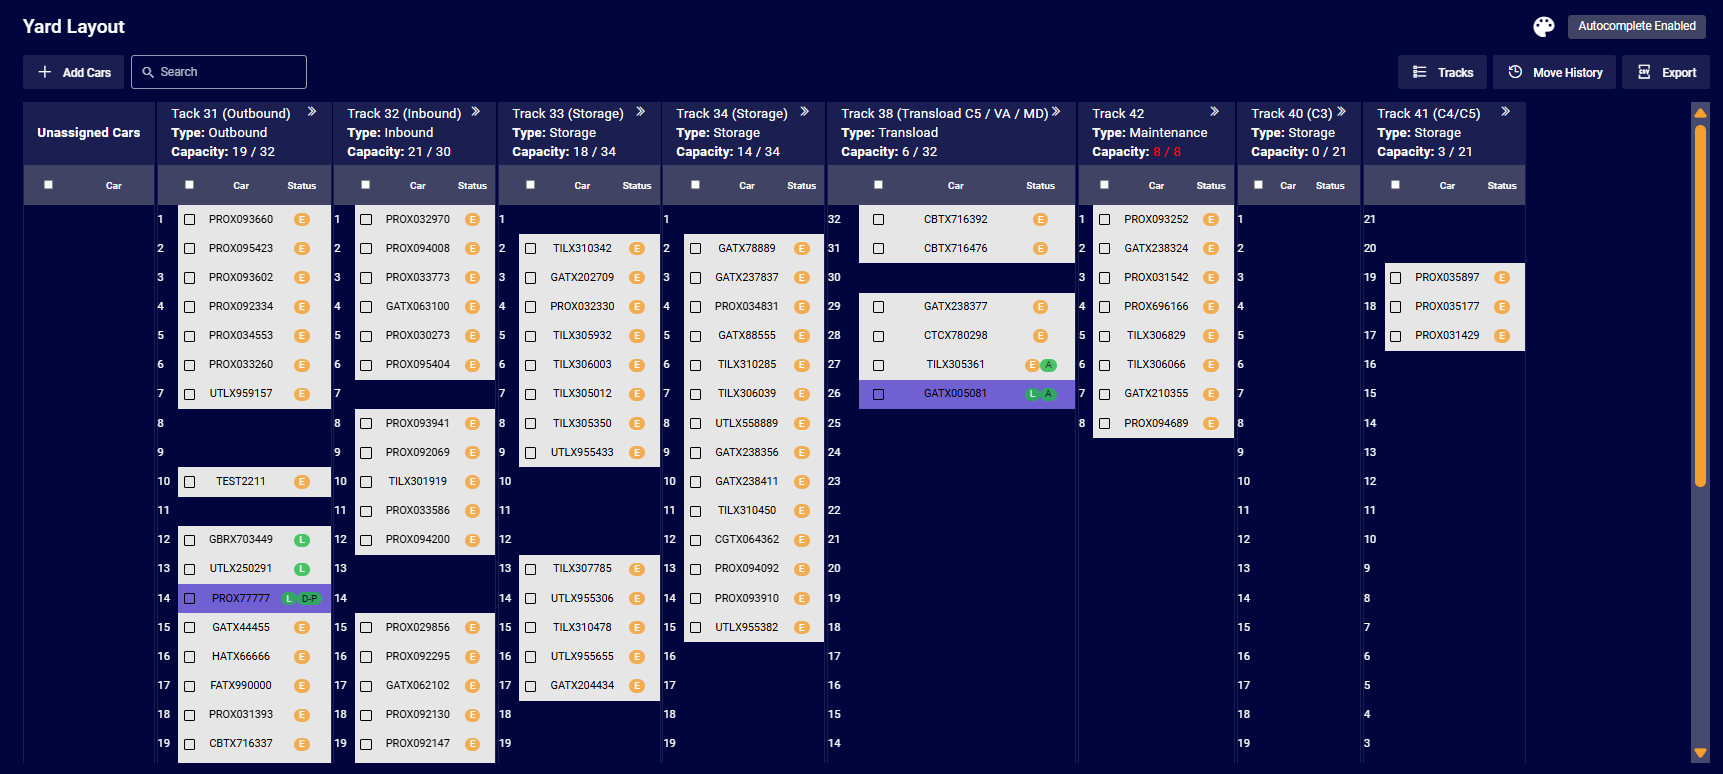
The Yard Layout module provides a visual representation of a rail yard's track organization and car inventory. This interface allows users to view, manage, and track railcars across multiple tracks, each with specific designations and capacity limits.
Interface Elements
Top Bar Controls

-
Yard Layout - Title of the module.
-
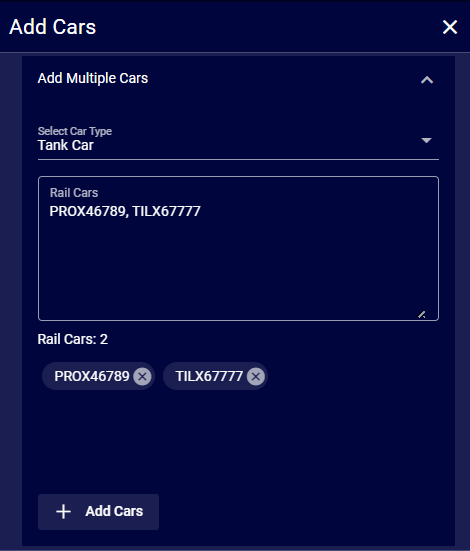
Add Cars - Button that allows adding new cars to the yard. Cars will go into Unassigned Cars column. It opens up a modal which allows users to type or paste an unlimited amount of cars:
-
Search - Text input field for filtering cars across the yard. Search functionality works for Car mark & number, Product, Customer, Empty/Loaded status.
-
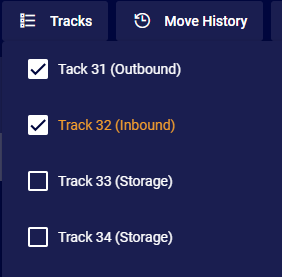
Tracks - Button allows users to select what tracks they want visible/hidden.
-
Move History - Button that displays a log of car movements within the yard. Yard movements such as Move, Removed, Shipped, Added are tracked. Clicking this button opens up a modal with details:

-
Export - Button for exporting yard data to PDF and Excel formats.
-
Autocomplete Enabled - Toggle indicator showing that autocomplete functionality is active (as opposed to the Switch List mode)
Track Organization

The yard is divided into multiple tracks, each represented as a vertical column with the following details:
-
Track number and designation - Header showing track number/name and purpose in parentheses (e.g., "Track 31 (Outbound)").
-
Type - Specifies the track's purpose (e.g., Outbound, Inbound, Storage, Transload).
-
Capacity - Shows current usage and maximum capacity (e.g., "7 / 32" indicating 7 cars on a track with 32-car capacity).
-
Expandable sections - Tracks can be expanded/collapsed using arrow icons to view more details such as Product, Customer, Origin, Destination, Received Date, Loaded Date, Weight, Volume, Density and Status. See below:

Track Types Displayed
-
Unassigned Cars - Cars not yet assigned to specific tracks. This column is integrated with Track and Trace and new cars from the “Add car” button are shown here.
-
Outbound - Tracks for cars ready to depart the facility.
-
Inbound - Tracks for cars arriving at the facility.
-
Storage - Tracks for holding cars in inventory.
-
Transload – Tracks designated for transloading.
-
Maintenance - Tracks designated for car maintenance or repairs.
Car Information Columns
Each track contains cells showing:
-
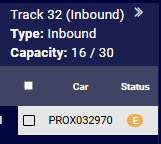
Checkbox - For selecting individual cars
-
Car - Car identifier numbers (e.g., PROX029291, GATX789555)
-
Status - Visual indicator showing car status – E for Empty & L for Loaded
-
Position number - Sequential numbering of cars within each track
Usage Instructions
View Track Organization
-
Each vertical column represents a track in the yard
-
Track headers show track number, type, and capacity
-
Cars are listed in order from top to bottom within each track
-
Status indicators provide at-a-glance information about each car
Add Cars to the Yard
-
Click the "Add Cars" button or select cars based from track and trace integration
-
Enter car mark and number
-
Assign cars to specific tracks from the unassigned cars column
Search for Cars
-
Enter car identifiers, track numbers, or status information in the Search field
-
Results highlight matching cars across all tracks
Move Cars Between Tracks
-
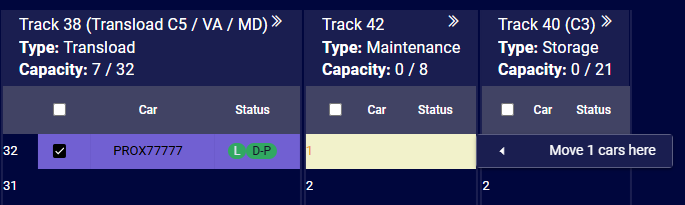
Select one or more cars using the checkboxes
-
Click on the spot where the car should be moved to
-
Click on “Move x cars here”
Navigate to Connected/Related Modules
-
Use the search bar to search for the desired car
-
Navigate to the car that is highlighted by the system
-
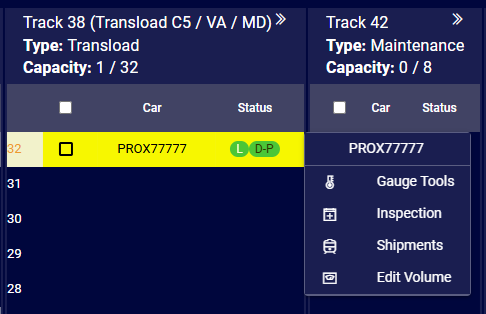
Click on the highlighted cell
-
The navigation box opens up beside the car
-
From the box users can:
-
Navigate to Gauge Tools
-
Navigate to Inspection
-
Navigate to Shipments
-
Edit the Car Volume
-
Delete Cars from the Yard
-
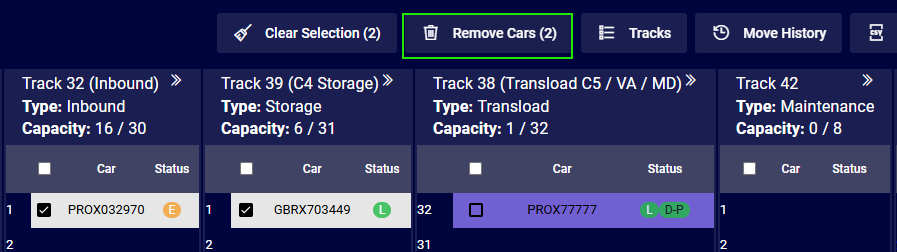
Select the cars to be deleted
-
Click the Remove Cars button that pops up
-
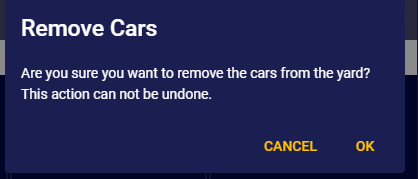
The system shows a confirmation modal to cancel or complete the action
Export Yard Data
- Use the “Tracks” button to select and deselect the tracks you want to see:
-
Click the Export button
-
Select preferred format – Excel or PDF
-
The file is downloaded