Cross Border
Getting Started
To create a Cross Border Contract or Ticket, ensure the Cross Border feature is enabled for the site within the TBOSS admin (Refer to TBOSS User Guide).
Cross Border Related Objects
Companies Model
Please refer to the Company Model Chapter how to Create, Edit and Save Company.
To create a Company that is expected to carry out Cross Border activities:
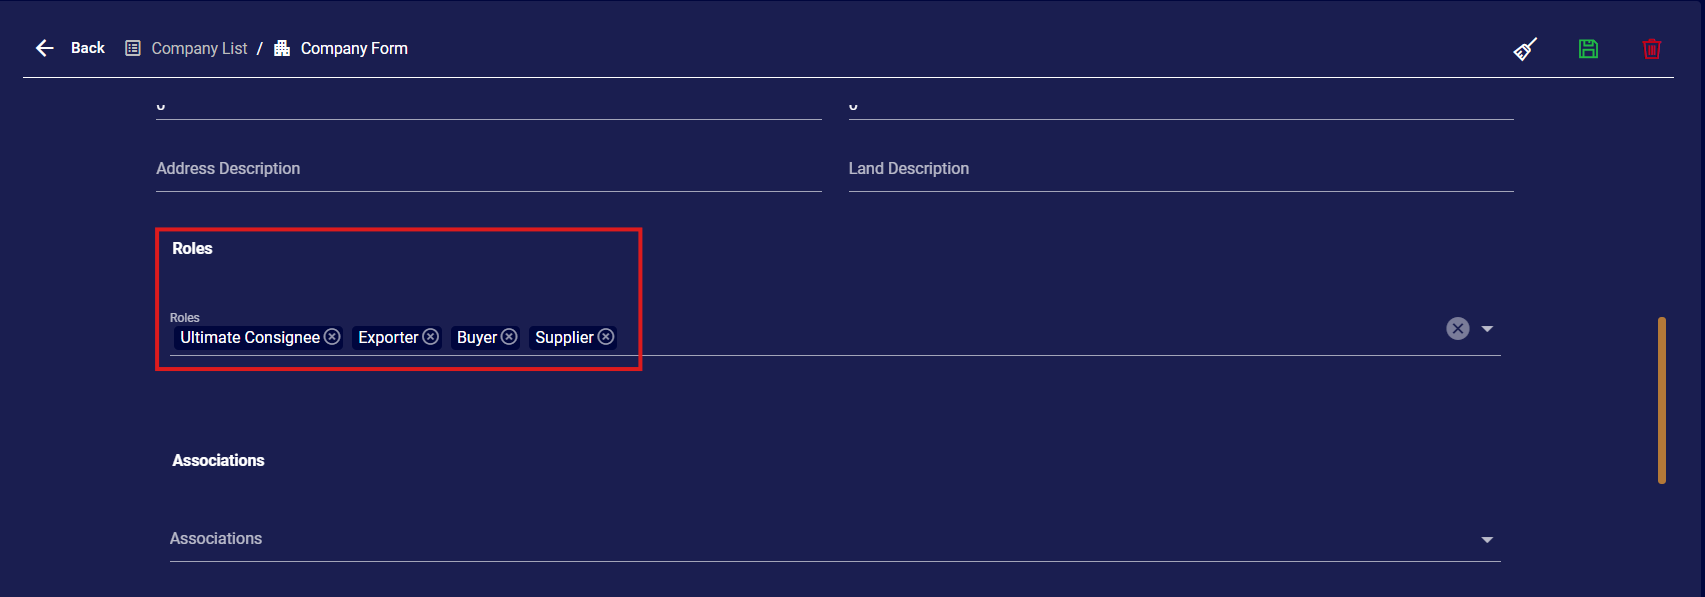
In the Roles section of the Company form, assign one or more Cross border related roles to the Company.
| Roles | Definition |
|---|---|
| Ultimate Consignee | The party that is the final recipient of the goods being transported. |
| Supplier | The party providing the goods for shipment. |
| Exporter | The party responsible for sending goods out of the originating country. |
| Buyer | The party purchasing the goods. |
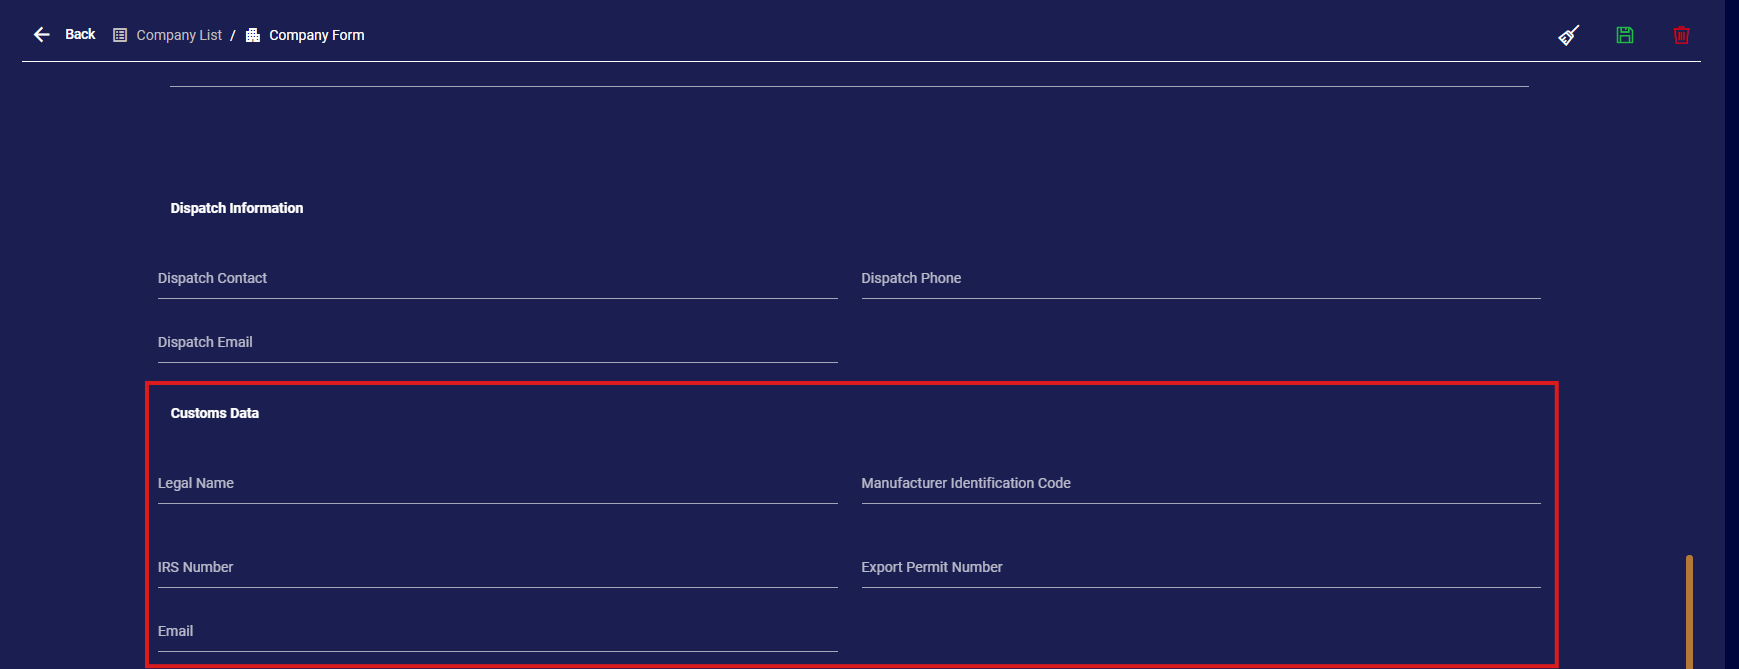
Navigate to the Customs Data section of the company form. This section allows a user to enter the Cross Border details for a Company. These fields are: Legal Name, Manufacturer Identification Code, IRS Number, Export Permit Number, Email
Product Model
Please refer to the Product Model Chapter how to Create, Edit and Save Products.
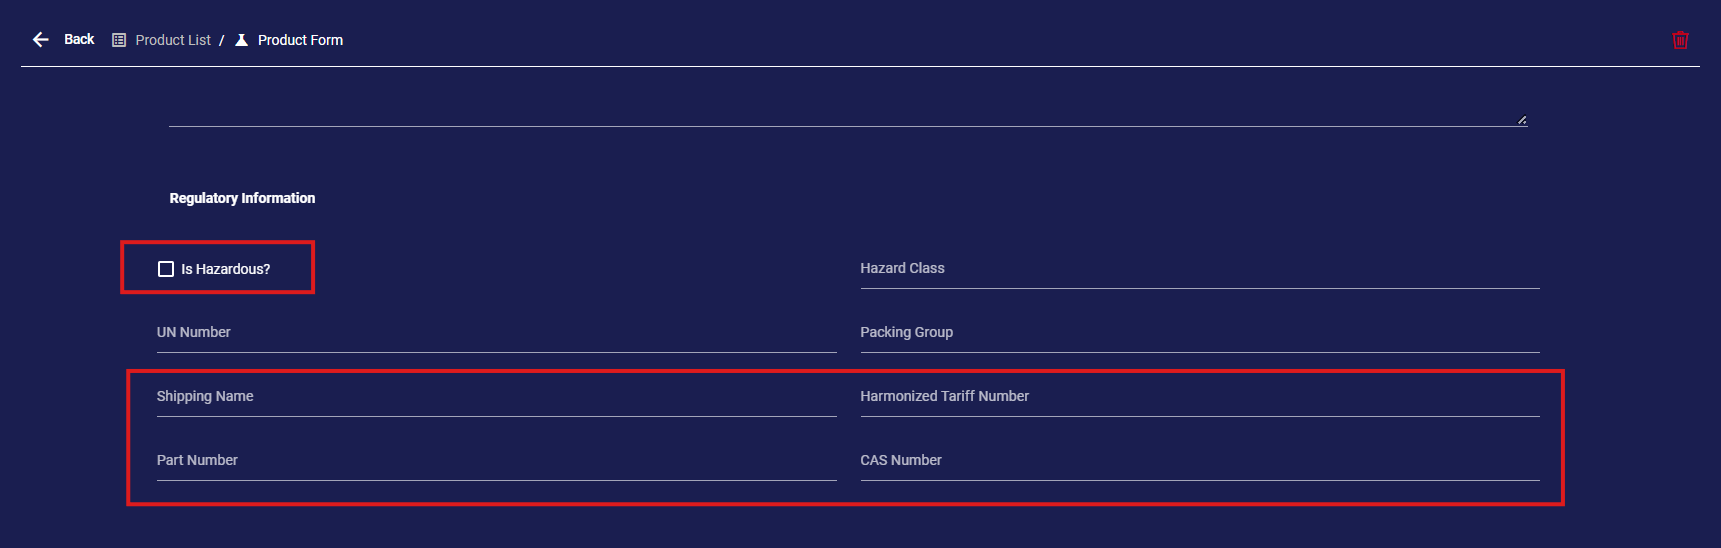
On the Product form navigate to the Regulatory Information section. This section allows a user setup a Product for the Cross Border feature. These fields include Hazardous flag, Harmonized Tariff Number, Part Number, Shipping Name, CAS Number
-
Hazardous Flag: A designation indicating whether the product being shipped is classified as hazardous material under applicable transportation or regulatory guidelines.
-
Harmonized Tariff Number (HTS): A standardized numerical code used to classify a product for customs purposes, determining duties and taxes for cross-border shipments.
-
Part Number: A unique identifier assigned to a specific product or component by the manufacturer for inventory, shipping, and tracking purposes.
-
Shipping Name: The official name used to describe the product being shipped, especially for regulatory or customs documentation purposes.
-
CAS Number: A unique numerical identifier assigned by the Chemical Abstracts Service to a specific chemical substance, used to ensure accurate identification in transportation and regulatory compliance.
Location Model
Please refer to the Location Model Chapter how to Create, Edit and Save Location.
On the Location form navigate to the Address Section. The Address section allows a user to enter the address details of a Location for the Cross Border feature.
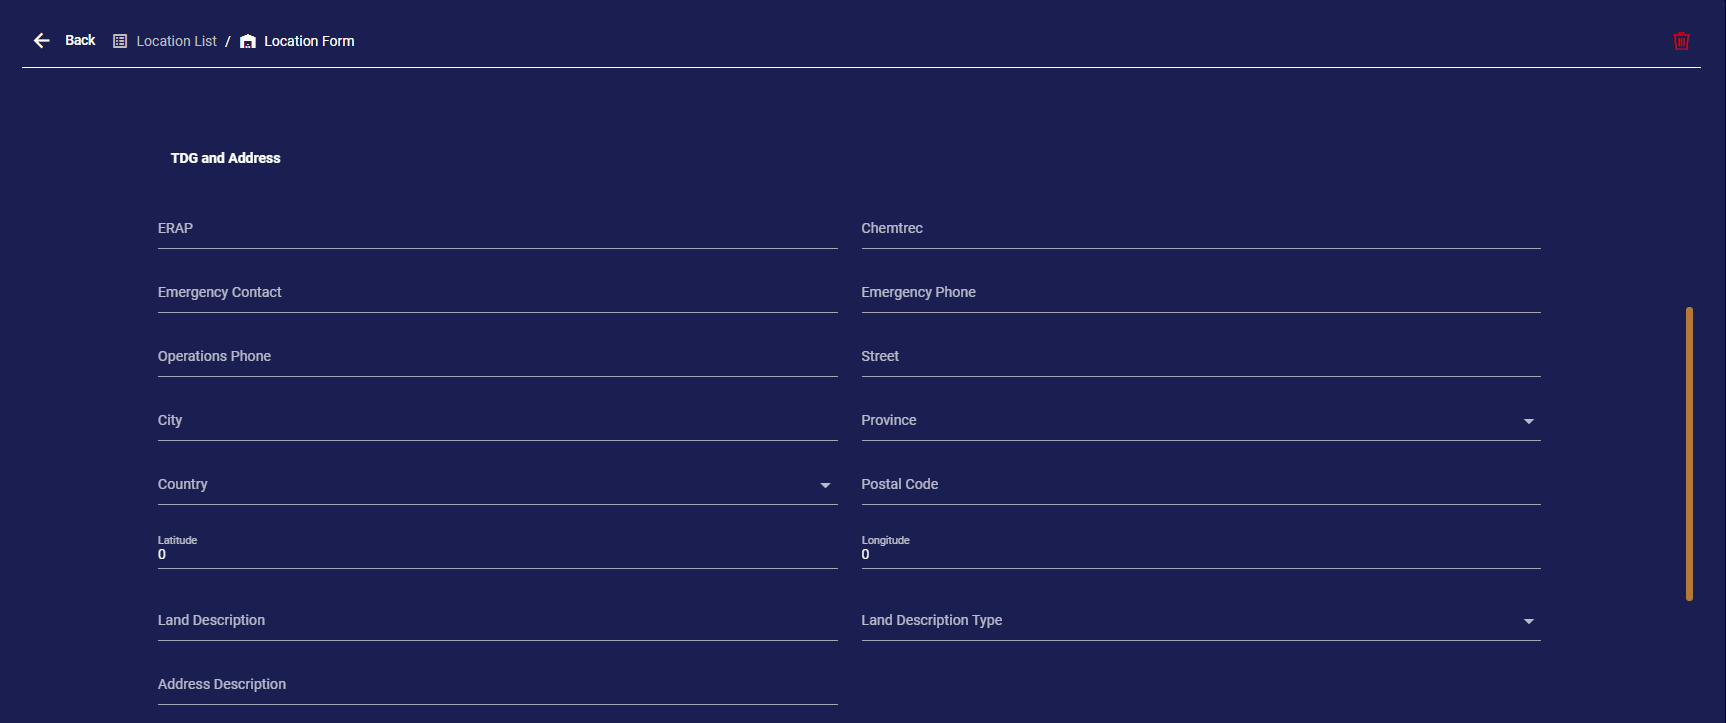
Enter a unique address identifier in the Address Description field if the location is associated to Cross Border loading, else leave empty for Domestic Load.
Cross Border Contracts
Permissions
The relevant list of permissions for the Border Contracts object:
-
Access to V3 Sync Data Cross Border Contract
-
Can change cross border contract
-
Can view cross border contract
Navigation
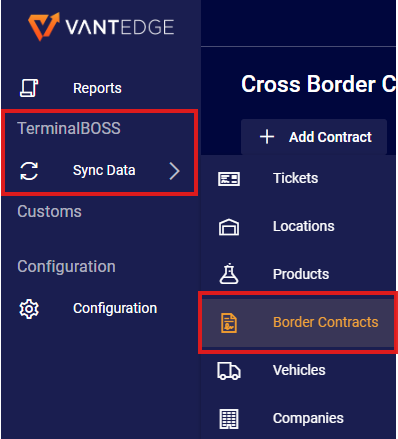
To view Cross Border Contracts, navigate to the left side menu, click on Sync Data and then select Border Contracts.
Landing Page

Similar to other modules, this table has filter and sorting ability.
Create a new Record
Permitted users can create new records under the Border Contracts object by selecting “Add Contract”. This action opens up a black form that can be filled out.

When filling the border contract form, always start by defining the site management section before filling out the remaining fields:
Site Management, Name, Contract Number:

The Buyer, Shipper/Supplier and Exporter parties are then selected:
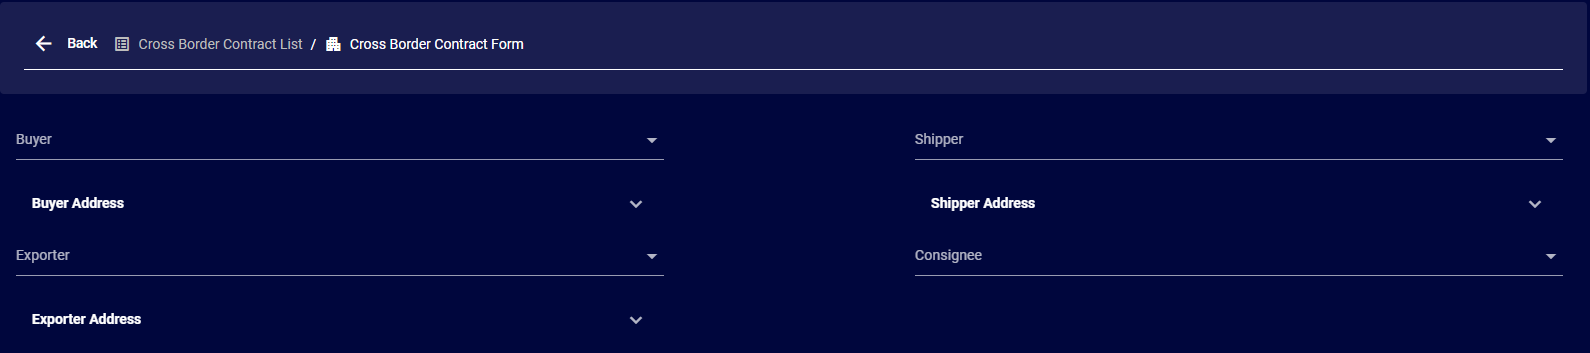
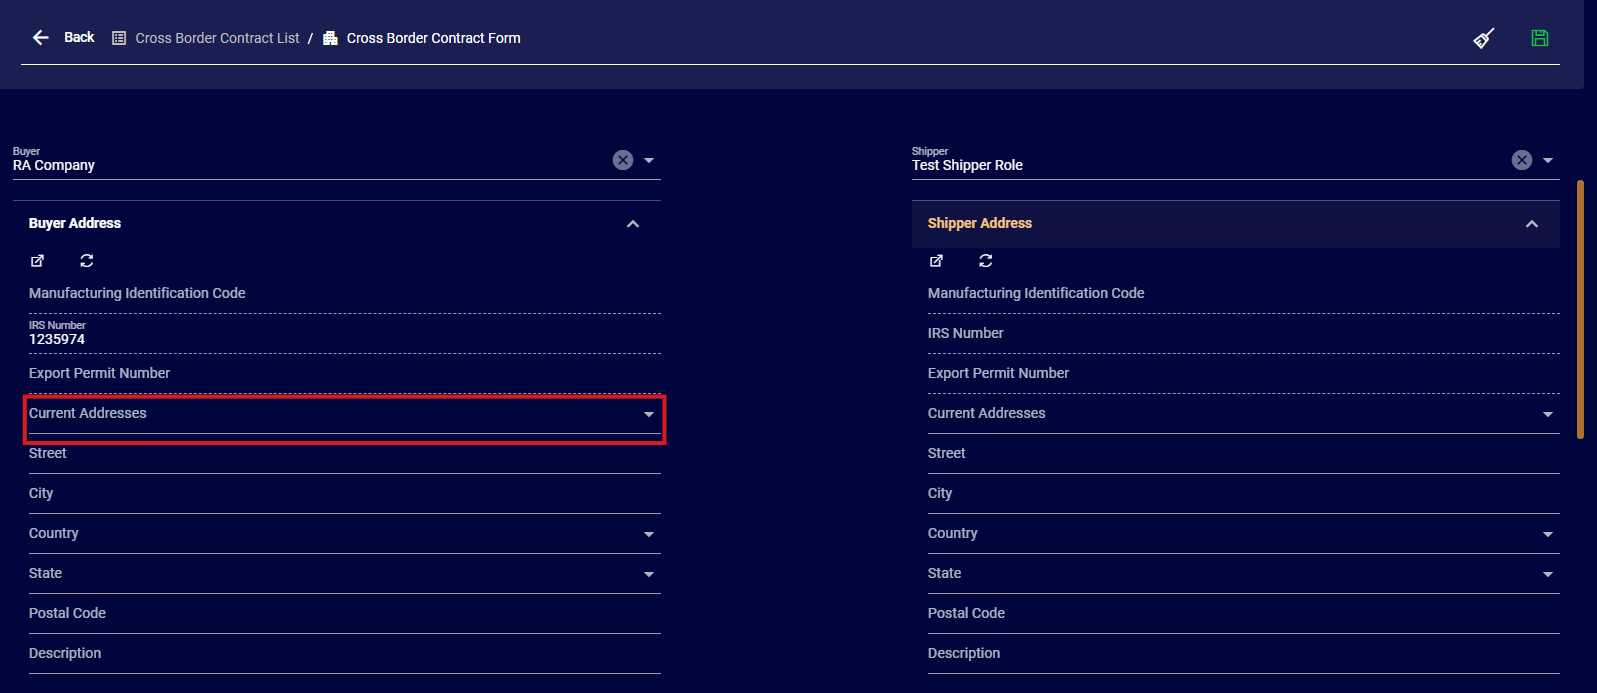
After a party has been selected, expanding on the addresses dropdown will allow users to enter a new address for a party or select one of the available options using the “current addresses” dropdown:
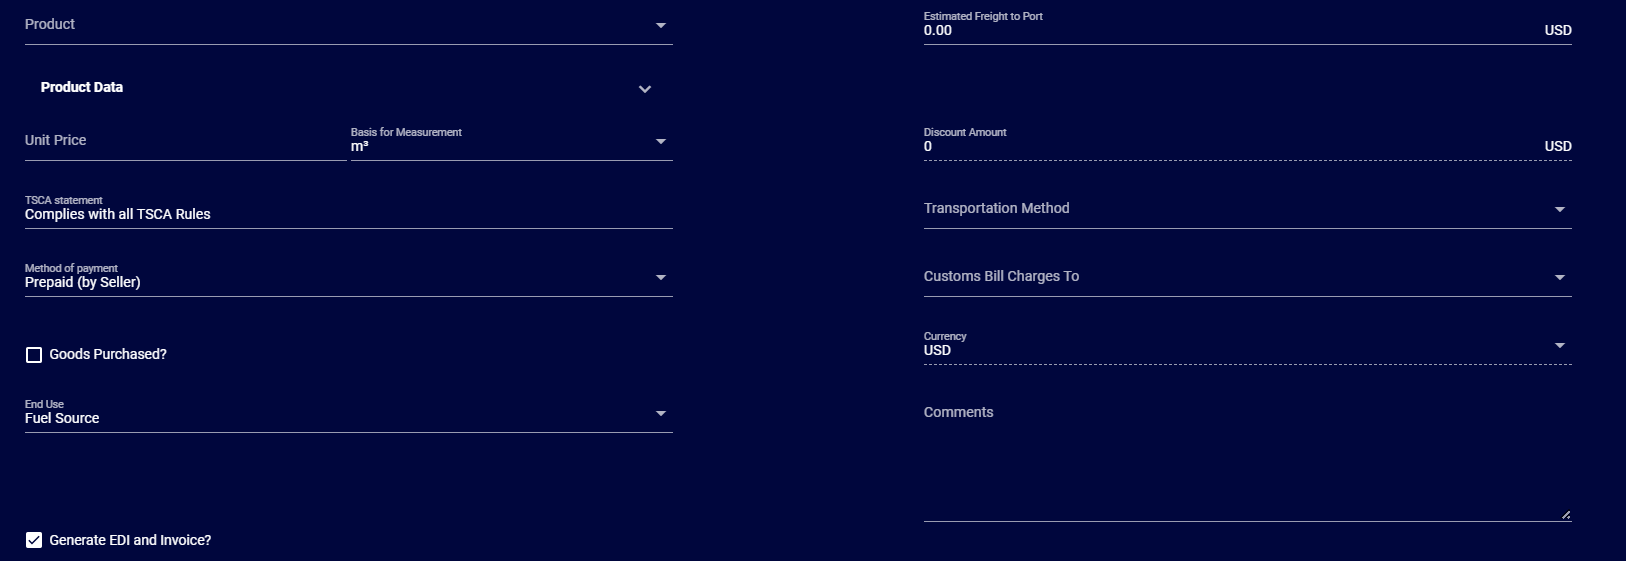
Other cross-border-related fields:

-
Transaction Type (e.g., Prepaid Invoice): Indicates the payment arrangement for the shipment, such as whether the invoice is paid upfront (prepaid) or on terms.
-
Country of Origin: Specifies the country where the product was manufactured, grown, or otherwise produced.
-
Invoice Price Includes: Lists the components included in the invoiced price, such as freight, insurance, or taxes.
-
Country of Export: Identifies the country from which the shipment is being sent, in this case, Canada.
-
Responsible Employee: Refers to the employee accountable for overseeing the shipment or ensuring compliance with cross-border requirements.
-
Terms (e.g., Basic, End of Month): Specifies the payment terms agreed upon between the buyer and seller, such as payment due upon delivery or at the end of the month.
-
Delivery Terms (e.g., Delivered Duty Paid): Defines the shipping terms, including who is responsible for paying duties, taxes, and transport costs, such as "Delivered Duty Paid" meaning the seller bears all costs to the destination.
-
Product: Describes the goods being transported, including their classification, description, or identification codes.
-
Estimated Freight to Port: Represents the estimated cost of transporting the goods from the origin point to the departure port.
-
Unit Price: Indicates the price per unit of the product as specified in the invoice.
-
Transportation Method: Specifies the mode of transport used for the shipment, such as rail, truck, or air.
-
TCSA Statement: Refers to the Toxic Substances Control Act compliance statement, confirming the shipment meets regulatory requirements for certain chemical products.
-
Method of Payment: Indicates how the buyer will pay for the goods, such as cash, credit, or electronic transfer.
-
Customs Bill Charges To: Identifies the party responsible for paying customs duties and fees, such as the buyer, seller, or a third-party broker.
-
Currency: Specifies the currency in which the invoice is denominated, such as USD or CAD.
-
End Use: Refers to the intended purpose or application of the product being shipped, such as industrial use, retail sale, or personal consumption.
-
Buyer Related: Indicates whether the buyer is associated to the exporter.
-
Goods Purchased: Specifies whether the goods in the shipment are part of a purchase transaction rather than other non-sale arrangements.
-
Generate EDI and Invoice: The checkbox enables the system to automatically create and send the Electronic Data Interchange (EDI) file and associated customs invoice for the shipment.
Once a new Cross Border Contract is created on Wheelhouse, it is Synced to TerminalBoss. If any data on the Contract is updated in Wheelhouse that change is synced and reflected on TerminalBoss.
Cross Border Tickets
Ticket Creation
Refer to the TBOSS User Guide.
Ticket Viewing and Editing Customs Data
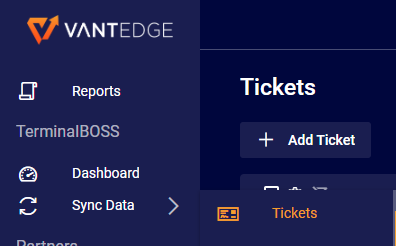
Navigate to the Ticket Module on Wheelhouse.
Select a cross border ticket by using the column “Cross Border” which identifies the ticket as a cross border ticket.
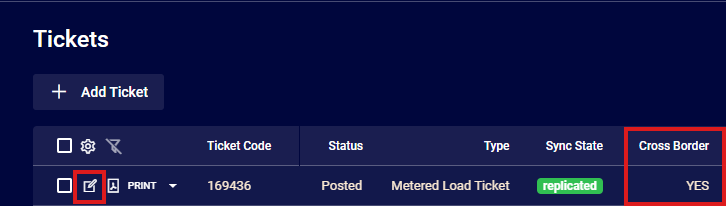
Open the ticket to view the cross border/ customs relevant data:
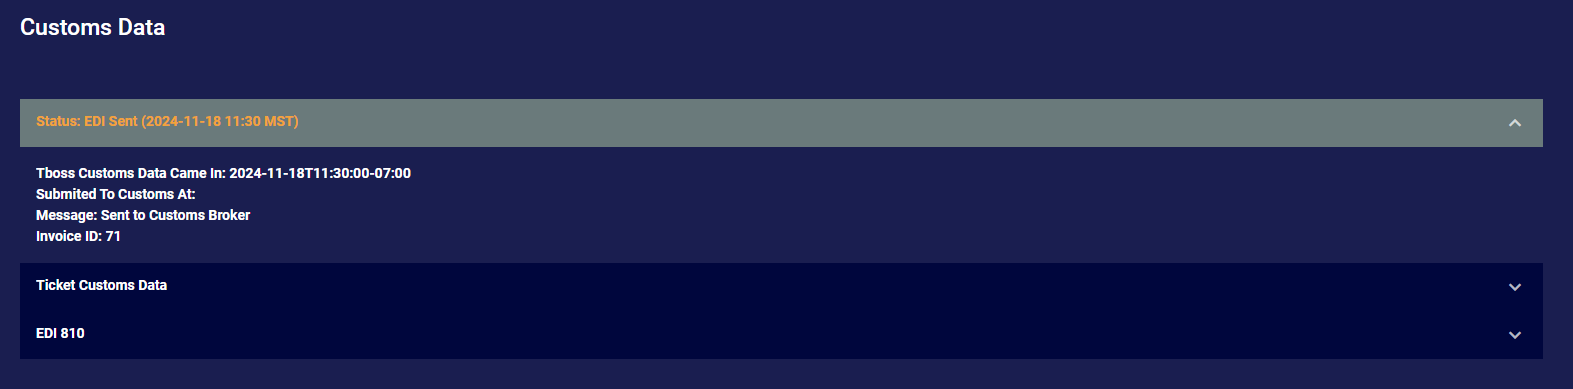
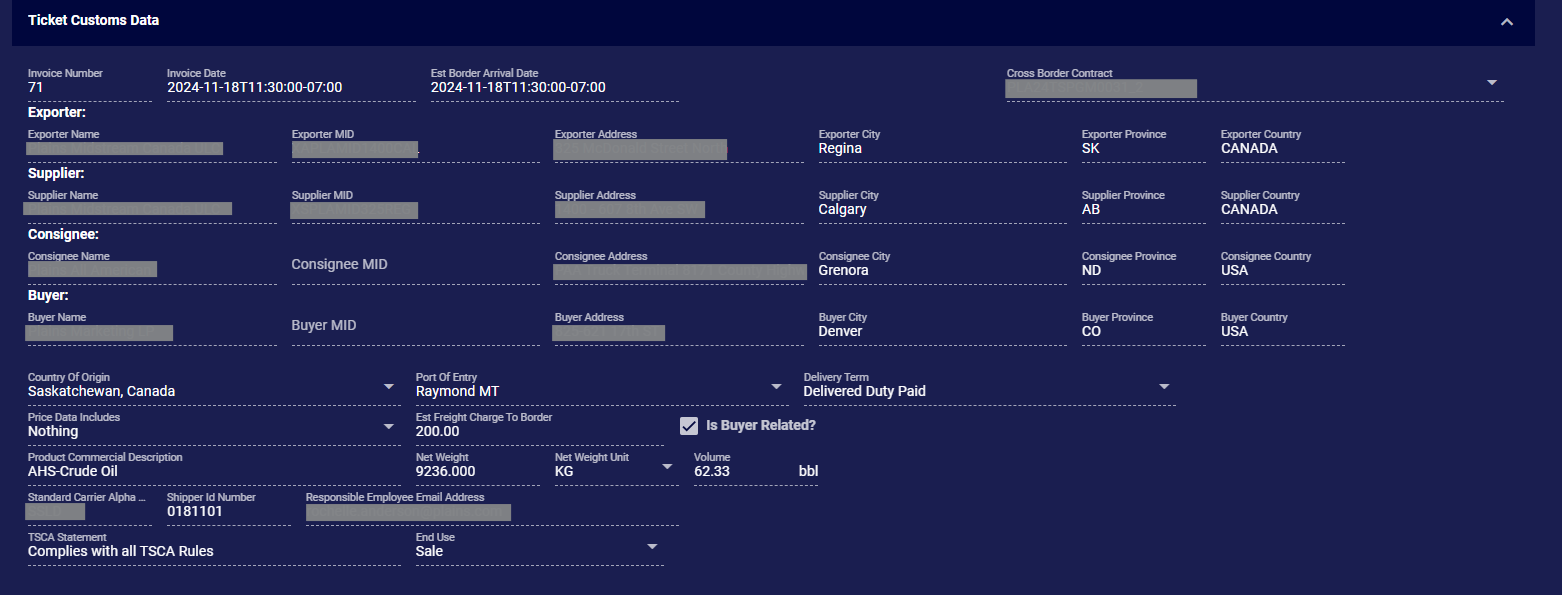
If anything related to the customs data needs to be edited that can be done here:
Cross Border Invoice and EDI
Invoice and EDI Creation
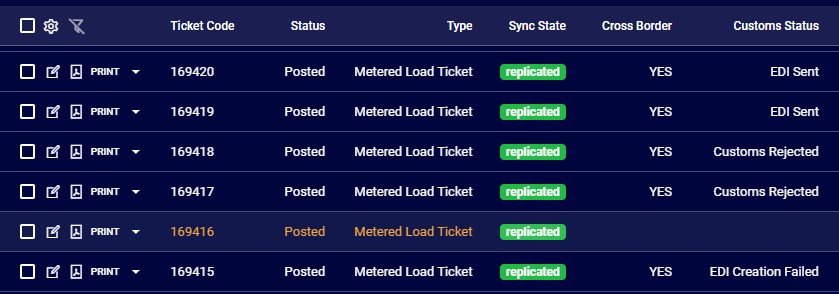
Once a cross-border ticket has been created during the TBOSS HMI workflow, this ticket syncs down to Wheelhouse. It will then generate an invoice, and an EDI based on the information provided in the contract and ticket. The ticket will move through different stages: Ticket creation (on TBOSS) -> ticket synchronization to Wheelhouse -> invoice creation from ticket data -> EDI creation -> EDI sending to customs broker. Based on this flow, the status of the ticket will change accordingly as seen in the “Customs Status” column in the screenshot:
Statuses & Descriptions
-
Invoice Pending
Description: The customs invoice is waiting to be created using the details from the truck ticket. -
Invoice Creation Failed
Description: An error occurred while generating the customs invoice from the truck ticket information. -
EDI Pending
Description: The EDI document is pending creation from the customs invoice details. -
EDI Creation Failed
Description: An error occurred during the creation of the EDI document based on the customs invoice. -
EDI Transmission Failed
Description: An error occurred while sending the EDI document to the customs brokerage. -
EDI Sent
Description: The EDI document has been successfully transmitted to the customs brokerage. -
Customs Rejected
Description: The customs brokerage reviewed and rejected the EDI document. -
Customs Accepted
Description: The customs brokerage reviewed and accepted the EDI document.