Gauge Tools
The Gauge Table System simplifies loading operations and ensures accurate volume calculations. By following this step-by-step guide, you can efficiently use the system for safe and efficient loading processes.
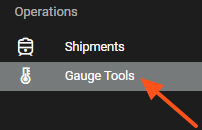
The Gauge Tools submenu can be accessed from within the Operations menu on the left:
Gauge Workflow
-
Access the Tool
-
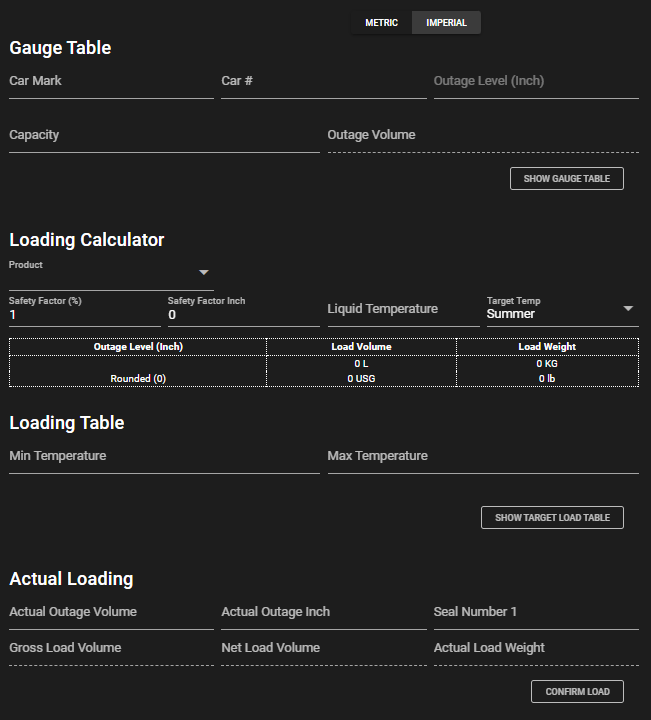
Navigate to the Gauge Table tool.
-
Enter the railcar details: Car Mark and Car #
-
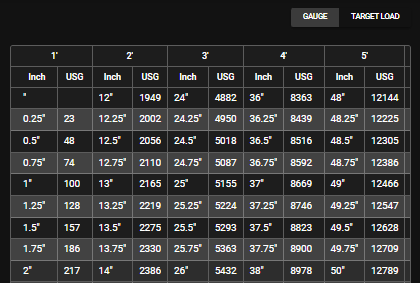
Click on Show Gauge Table to bring up the Gauge Table.
-
-
-
Enter Load Characteristics
-
Fill in the Outage Level in inch, and the Outage Volume will be auto calculated based on the Gauge Table on the right.
-
-
Utilize the Loading Calculator
-
Specify the Product.
-
Adjust the Safety Factor (%) and check the corresponding Safety Factor Inch.
-
Enter the Liquid Temperature and consider the Summer Target Temp.
The Outage Level (Inch), Load Volume, and Load Weight data will be auto generated.
-
-
Refer to the Loading Table section.
-
Enter the values for Min Temperature and Max Temperature.
-
Click on Show Target Load Table to generate the recommended target load volume within the minimum and maximum temperature for the shipment duration.
-
-
Actual Loading details
-
After loading, input any of the following:
-
Actual Outage Volume
-
Actual Outage Inch
-
Seal Number 1
-
-
The table will compute the following:
-
Gross Load Volume
-
Net Load Volume
-
Actual Load Weight
-
-
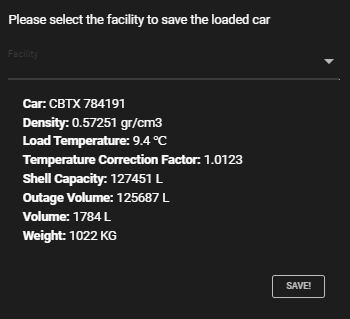
Click on Confirm Load
-
Note the Metric values of the load volumes
-
-
To save the loaded car to a facility, select the facility and click on Save.
-
Press Esc or Click outside of the box to cancel.
-
-
Review & Confirm
-
Ensure all values are correctly filled and correspond to the safe loading parameters. Adjust as necessary.
-
Field Descriptions
Car Mark
- Indicates the unique identifier or branding of the railcar company. It helps in distinguishing between different cars from various companies.
Car #
- This is the specific number assigned to an individual railcar. Each car will have a unique number for identification.
Outage Level
- Refers to the height (in inches) from the top of the tank to the liquid's surface. It helps determine the vacant space in the tank.
Capacity
- The total volume (in US gallons) the railcar can hold.
Outage Volume
- The volume equivalent to the outage level. It represents the vacant volume in the tank.
Loading Calculator
- This section assists in computing the safe loading values based on various factors.
Product
- Specifies the type of liquid or product being loaded onto the railcar.
Safety Factor
- A percentage representing the safe limit below the railcar's maximum capacity to prevent overloading.
Safety Factor Inch
- Equivalent to the safety factor in inches. Represents the safe vacant height from the top of the tank.
Liquid Temperature
- The current temperature of the liquid being loaded. This can affect the liquid's volume.
Summer Target Temp
- The expected temperature during the summer months, used for calculating temperature-induced volume changes.
Loading Table
- A table that computes loading values based on the provided data.
Min Temperature and Max Temperature
- The range of temperatures the product can safely be subjected to.
Actual Loading
- This section provides the details of the actual loading process and values.
Actual Outage Volume and Actual Outage Inch
- The final vacant volume and height in the tank after loading.
Seal Number 1
- A unique identifier for the security seal applied to the railcar post-loading.
Gross Load Volume and Net Load Volume
- Gross refers to the total loaded volume, while net is after accounting for safety factors and other deductions.
Actual Load Weight
- The weight of the loaded product.