Shipments
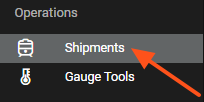
The Shipments submenu can be accessed from within the Operations menu on the left:
-
The first page you’ll see is a list of Facilities. To view facilities only with connected railroad, select the checkbox at the top right corner of the page.

-
Select a facility from the list provided you want to schedule shipments for.

-
Here you will see three separate headings.

-
Schedules
-
The schedules tab shows important fields such as the Schedule Name, Origin, and Destination, Product, Seller, Buyer, Shipper, Consignee.
-
Select the ‘+’ beside Create New Shipment to expand and view further information.

-
This information includes items such as Shipment Status, Reference Number and a Link.
Shipments
-
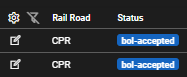
The Shipments tab shows a List View of information regarding your shipments to or from the chosen facility.
-
On the left-hand side, you will be able to select the icon to view its shipment data.
-
Once selected, you will be redirected to the corresponding Rail Shipment page, containing information for the shipment in question.
Located at the top right of the page, are these 6 selections for the rail shipment:

-
Notes
-
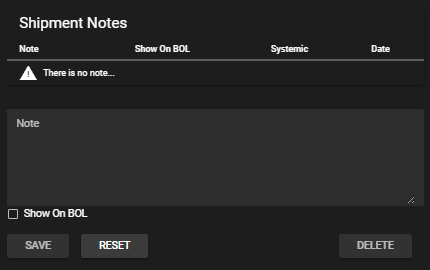
The notes section is designed to allow a user to create notes specific to a shipment. This can be used for internal purposes or, the option to place the note on the BOL is available.
-
-
Billing Amendments
-
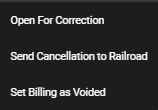
Selecting ‘Billing Amendments’ will bring the following three options.
-
-
Open for Correction – Allows for the editing of a shipment
-
Send Cancellation to Railroad – Cancels the current shipment
-
Set Billing as Voided – Voids the current shipment
- For (b) and (c), in addition to updating the rail shipment, we recommend contacting the railroad directly to cancel/void as well.
-
-
-
Contract
- When you select 'Contract', it directs you to the contract page where you can input all the shipment details. On this page, you can view and enter information related to the contract, product, pricing, notifications, and shipping schedules.
-
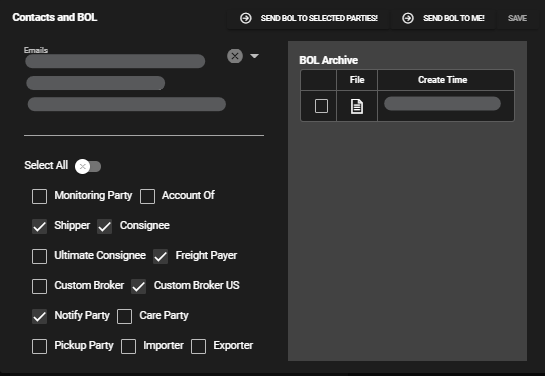
Contacts and BOL
-
Emails: An option to "Select All" for simplified communication with all listed contacts.
-
Roles: A set of predefined roles associated with the shipment, including Monitoring Party, Shipper, Consignee, and others.
-
BOL Archive: Historical records of Bill of Lading documents, with dates and times for easy reference.
-
-
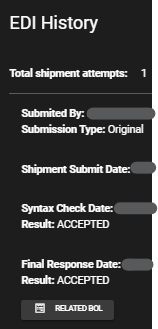
EDI History
-
Total shipment attempts: Indicates how many times data for this shipment was submitted.
-
Submitted By: Shows the email of the person or system that sent the shipment data.
-
Submission Type: Specifies if this shipment data is the first entry or a modification of prior data.
-
Shipment Submit Date: Timestamp of when the data was first sent.
-
Syntax Check Date: Timestamp of when the system verified the data's format.
-
Result (for Syntax Check): Outcome of the format verification, showing if the data adheres to standards.
-
Final Response Date: Timestamp of the system's or recipient's final decision on the shipment data after all checks.
-
Result (for Final Response): Final outcome, indicating if the data is ready for further steps or if issues arose.
- Selecting the Related BOL will display the BOL’s PDF in a new tab.
-
-
BOL
-
Selecting BOL, will show the BOL for that shipment in a new tab on your browser. Within this page, you may download and save the file in PDF format.
-
Cars
-
On the Cars page, one can view the option to Search Cars, Search BOLs and filter by Shipment Status on the left-hand side.

-
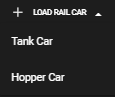
On the right-hand side, one can select Load Rail Car to have the following choices display and their steps are below.
-
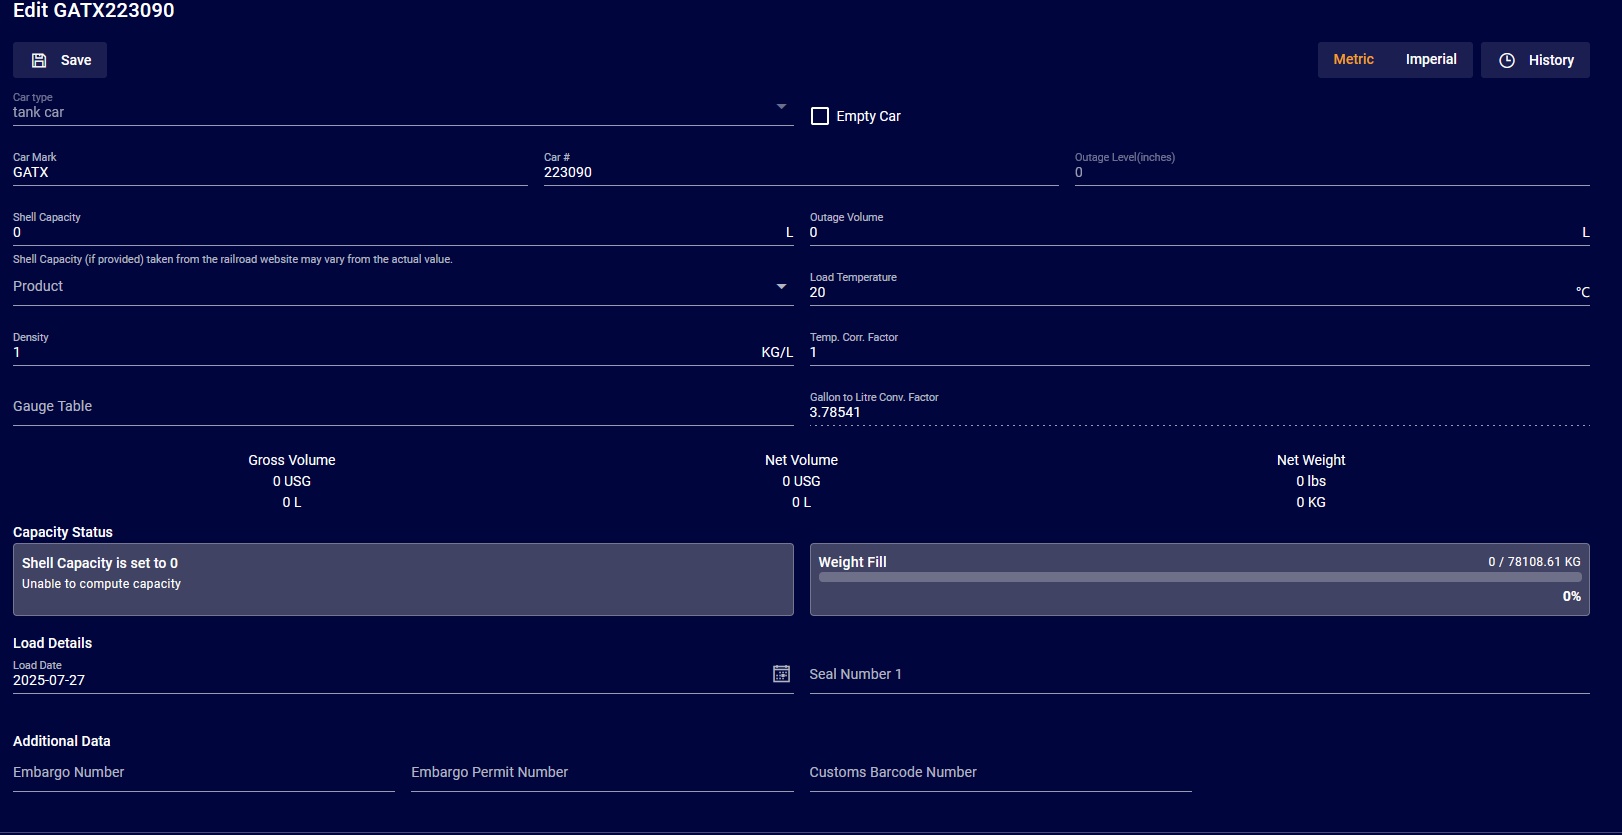
Tank Car – Easily switch between Metric and Imperial and follow the steps outlined below.
-
Identify Car: Input Car Mark and Car #.
-
Measure Capacity: Log Shell Capacity and check against provided value.
-
Record Product Data: Input Product, Load Temperature, and Density.
-
Calculate Volume: Record Outage Level, consult Gauge Table, and determine Gross Volume and Net Volume.
-
Apply Conversion: Use Gallon to Litre Factor.
-
Determine Weight: Calculate Net Weight.
-
Log Load Details: Input Order Number, Load Date, and Seal Number 1
-
-
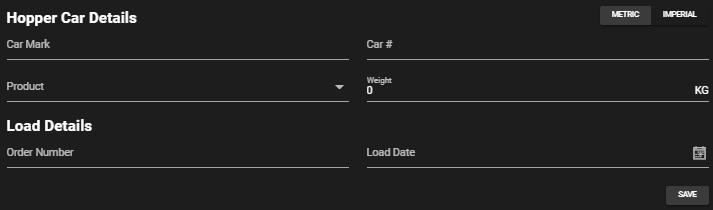
Hopper Car - Easily switch between Metric and Imperial
-
Identify Car: Input Car Mark and Car #.
-
Record Product Data: Specify the Product type.
-
Determine Weight: Input Weight in the corresponding measurement classification.
-
Log Load Details: Input Order Number and Load Date.
-
-
Shipment Workflow
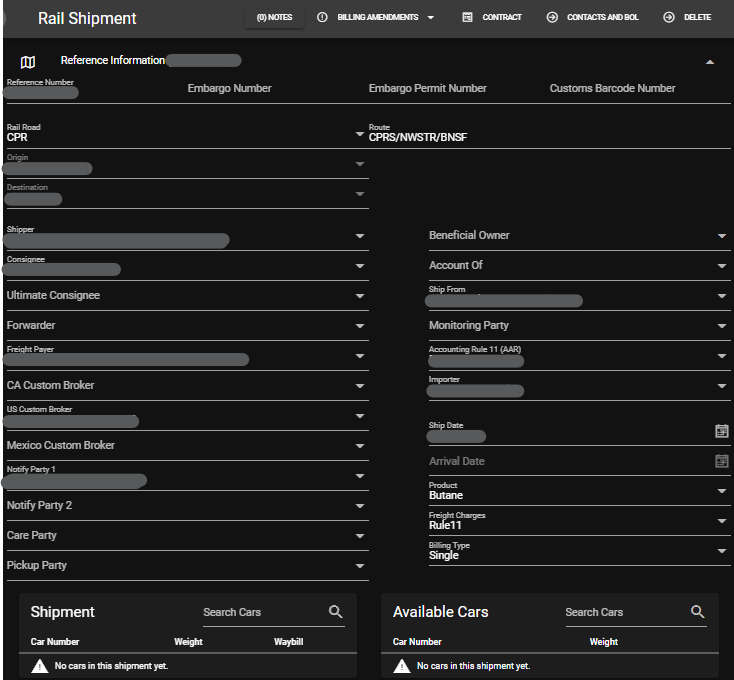
The Rail Shipment workflow is outlined below the following the image.
Workflow
-
Background Setup:
-
Before shipping, ensure all the necessary background elements are set up to avoid any problems.
-
Create all relevant parties that will be involved in the shipment. For instance, there might be a "Purchaser Party" and a "Seller Party".
- Apart from these default parties, other entities like 'freight payer', 'consignee', and 'monitoring parties' can be created as needed.
-
-
Set Defaults (Optional due to System Bug):
Ideally, click on a certain section to create these defaults.
However, due to a current system bug, defaults might need to be set from the admin page. -
Create a Schedule:
- Go to the "Shipments" section to view a created schedule.
- Choose the origin location (e.g., Vancouver) to see associated schedules.
- Review the details of the schedule, including the number of cars and involved parties.
- Use the "Create New Shipments" option to see further information.
At this stage, one can also add more elements such as rail cars (if available) to the shipment.
-
Loading Rail Cars:
There are two places to load a railcar:
- The "Cars" section
- The "Gauge" tool
Load Rail Cars Using the Gauge Tables Tool:
This method is more complex but offers another way to load rail cars.
- Start by entering the car number.
- Provide details such as product type, capacity, density, specific gravity, and liquid temperature.
- Confirm the load once all details are entered correctly.
- Choose "Add Rail Car" in the "Cars" section.
- Enter the Car Number.
- Select the desired product and input associated values.
If the car does not belong to the company or there's another issue, the system may restrict certain actions.
-
Add Loaded Cars to Shipment Schedule:
- Go back to the schedule and view the shipping schedule.
Newly loaded cars will appear as available to add to the shipment.
Select the cars you want to add. Note: There are product compatibility checks. For instance, a car loaded for propane might not be suitable for another product like butane.
- Go back to the schedule and view the shipping schedule.
-
Finalize and Ship:
If you're ready to ship, click on the option to do so.
Confirm sending EDI (Electronic Data Interchange) to the railroad.
Determine where you want the bill to be sent.
Optionally, view contracts or other details before shipping.
-
Embargo and Customs Details
-
Embargo Information:
-
Ensure necessary Embargo Number is present.
-
Input the associated Embargo Permit Number.
-
-
Customs Tracking:
- Input the Customs Barcode Number. This aids in customs tracking and identification.
-
-
Railroad and Route Information
-
Railroad Identification:
- Confirm the Rail Road associated with the shipment.
-
Route Specification:
- Identify the official Route from options like CPRS/NWSTR/BNSF.
-
-
Shipment Locational Details
-
Origin and Destination:
-
Specify Origin - indicating where the shipment begins.
-
Define Destination - the endpoint or delivery location.
-
-
-
Parties Involved
-
Main Parties:
-
Identify the Shipper, the party sending the goods.
-
Specify the Consignee, the main recipient of the shipment.
-
-
Intermediaries and Others:
-
Note down the Forwarder, responsible for the shipment in-transit.
-
Fill out details for Freight Payer, Custom Brokers, and others as necessary or available.
-
-
-
Shipment Product and Billing Details
-
Product Information:
- Input the Product, e.g., Butane.
-
Billing Details:
-
Enter information on Freight Charges.
-
Specify if it's a Rule11 billing or another type.
-
Choose the Billing Type - e.g., Single.
-
-
Continue to Car Information
-
-
Car Information
-
Shipment Car Details:

-
Check under Search Cars to see cars associated with the shipment.
-
If there are no cars, note "No cars in this shipment yet."
-
To add cars, search under Available Cars and select the required ones.
-
-
-
Finalizing Steps
-
Review:
-
Always review all input data for accuracy.
-
Confirm all mandatory fields have been filled.
-
-
Submission:
-
Once all data is verified, submit the shipment details for processing.
-
-