Slots
The 'Slot Management' system is a streamlined tool designed to facilitate the scheduling and booking of slots for drivers. This user-centric module ensures that dispatchers can efficiently assign slots without the need to manage slot creation which is done by operators or facility owner admins.
Riser Selection
Dispatchers begin by navigating to the slots page where they can view all available slots. Slots are pre-created and populated by operators to ensure that dispatchers can focus solely on assignment and management.
From the 'Slots' module, the dispatcher then selects the appropriate riser (location) for their driver’s booking.
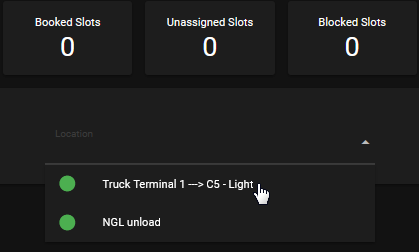
Upon selection, the available slots for the chosen riser will be displayed, showing the specific time frames available.
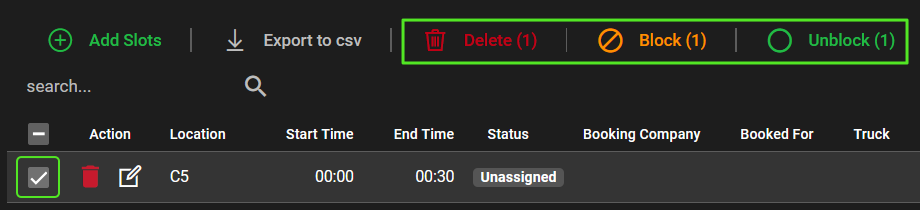
Those with the 'Scheduler Admin' role will be able to peform bulk actions to these available slots at any time by selecting the boxes on the right and can either 'Delete', 'Block', or 'Unblock'.
Creating Slots
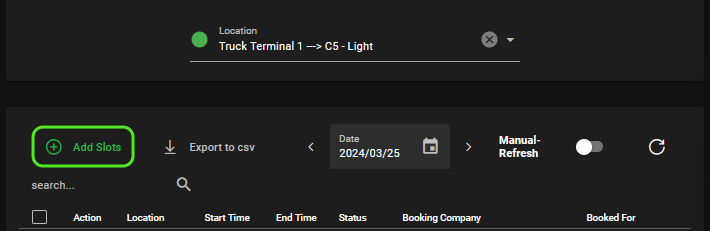
As a 'Schedule Admin', if no slots are available, you can create slots for a specified period of time. This will make times available for carrier companies to book drivers for. To begin creating slots, select the 'Add Slots' button.
Once that is selected, a form will pop up with required fields as seen below.
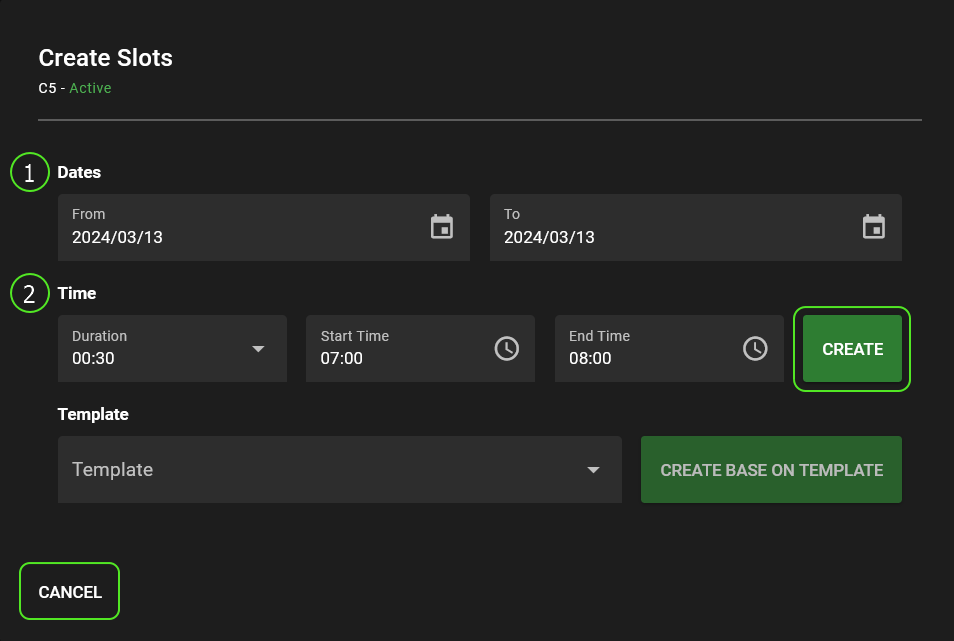
1. Dates
- Select the range of dates you would like to open booking for at a specific riser. This is typically done for a week or month.
2. Time
- You can define the duration of time slots and the range these slots will be available for. For example, if the location operates 24/7, you would create the slots starting from 00:00 to 23:55.
*If you have templates created, you can select that preciously created schedule from that dropdown.
Once the form was complete, selecting 'Create' would populate the table with slots and their specified duration.
Booking Drivers
Once the dispatcher has identified a suitable slot, they would click on the edit icon beside the slot to begin the booking process.

A form will appear which requires a user to enter booking information, such as the driver's details, vehicle information, and any specific instructions necessary for the booking.
Some fields are selectable via a drop-down and others will require manual entry.
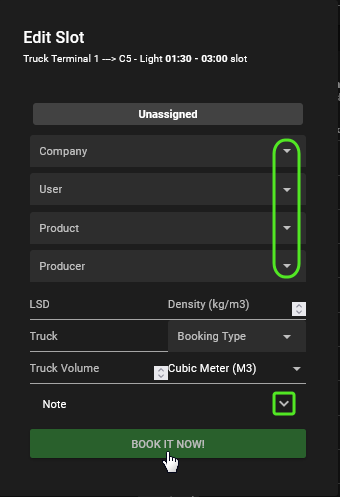
Once your booking form is complete, you will be asked to confirm your booking as seen in the image below.
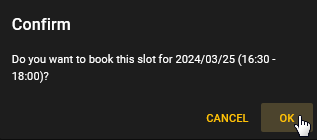
Upon confirmation, you will be able to see the booking for the driver on the schedule. We will cover amending and editing a booking in the next section.
Booking Management
Should there be a need to amend or edit a booked slot, dispatchers can return to the slots page and make their changes at anytime. Simply select the edit icon beside the booking you wish to change to begin the process.

The selection of the edit icon will bring up the 'Edit Slot' form as seen below. The form will be discussed in detail following the image.
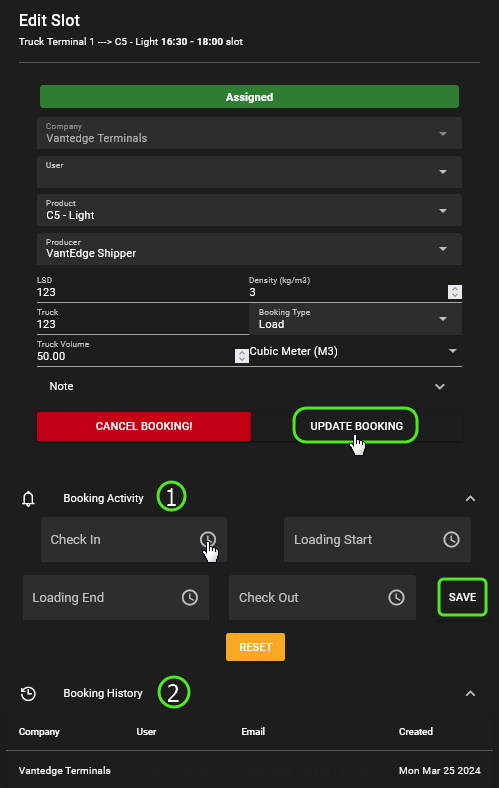
You can make changes such as driver or truck number and select 'Update Booking". These changes will reflect in real-time on the driver's app, keeping them informed.
1. Booking Activity
- If a driver is having difficulty, a dispatcher can insert the times a driver 'Checked In' or 'Checked Out'. This would populate the items in the workflow for both driver and dispatch views.
2. Booking History
- In the 'Booking History' section, a dispatcher or administrator can see all history associated with a bookng. This will be helpful to see activity such as cancellations or amendments to the booked slot.