Truck Scheduling for Drivers
The following are instructions specifically built for drivers to create and manage their schedule slots.
Accessing and Adding to Home Screen
The following steps will allow users to add the web-app to the home screen on their mobile device for easier access. The following are steps outlining the process for both IOS and Android.
- Open your phone and go to your preferred browser.
-
Click on the link below or type the following into your search bar to access the live version of the truck scheduling app.
https://app.wheelhouse.vantedgelgx.com -
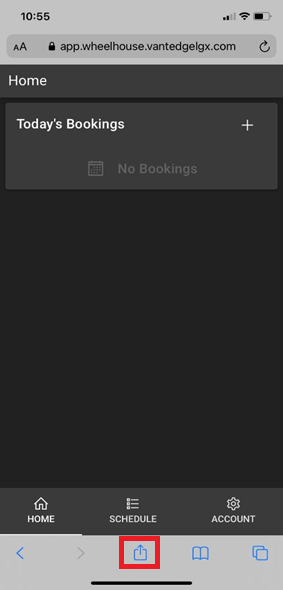
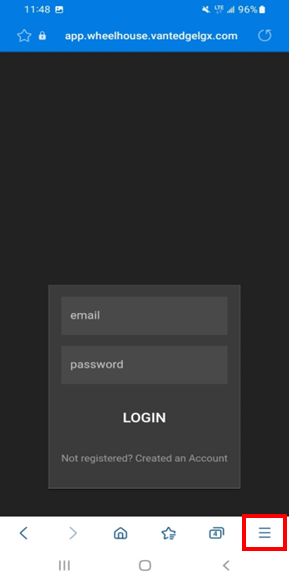
Once you have loaded the page, hit the
 (Apple) or
 (Android) button. This button will bring up a menu which will allow you to set your preference for the app and allow you to add it to your home screen.
-
Adding Link to Home Screen:
-
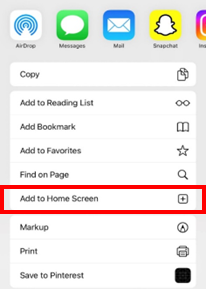
On Apple devices, scroll down to the option titled “Add to Home Screen”.
-
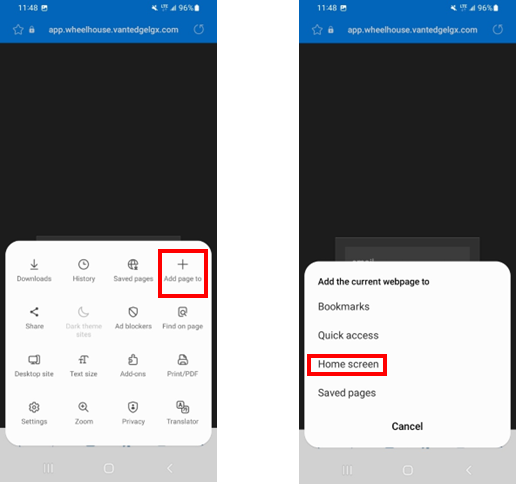
On Android devices, hit “Add page to” and then “Home Screen”.
-
-
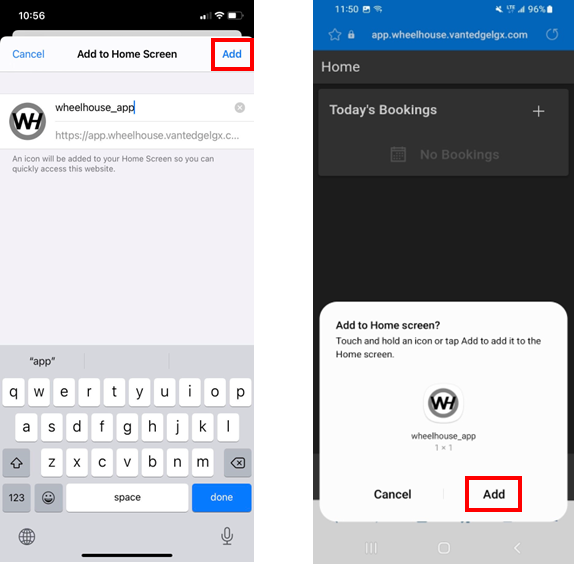
After selecting “Add to Home Screen”, you will have the ability to rename if desired and hit “Add”.
-
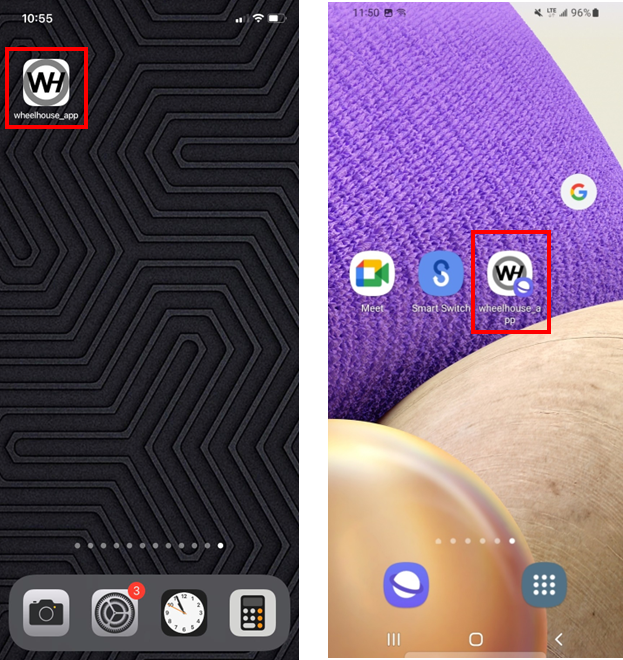
After selecting “Add” the app will be on your home screen and you can move to your desired location.
Allowing Location Services
Allowing locations services is a vital step to ensuring the app will function properly in areas such as check in and load booking. Below are the steps to enable location services on your browser which will be completed in two locations. There is also a video available to accompany the steps below.
-
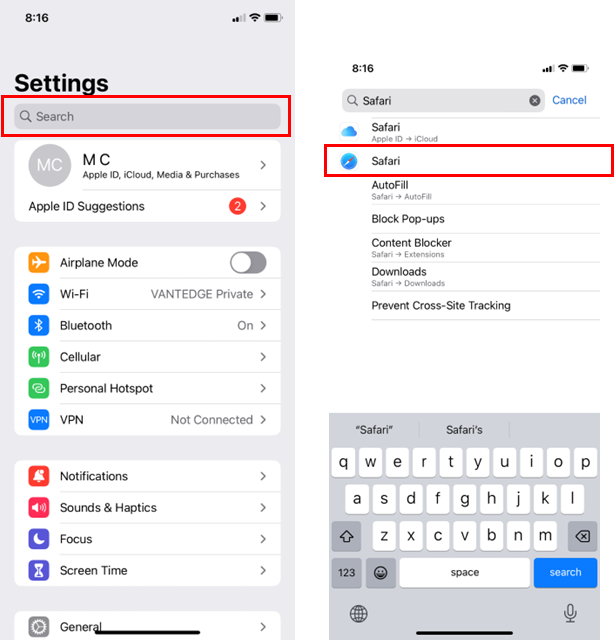
Open your settings app on your phone.
- Search the browser you use to access the app (i.e. Safari).
-
Select the browser to open its settings.
-
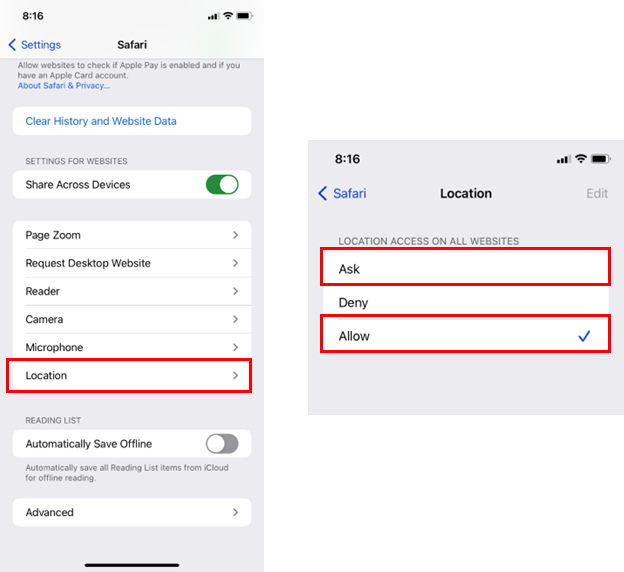
Scroll to the bottom and select “Location”.
- This page allows you to select “Ask” or “Allow” for location services.
-
It is important to remember if you select “Ask” to enable once the prompt appears.
-
-
Open your settings app on your phone.
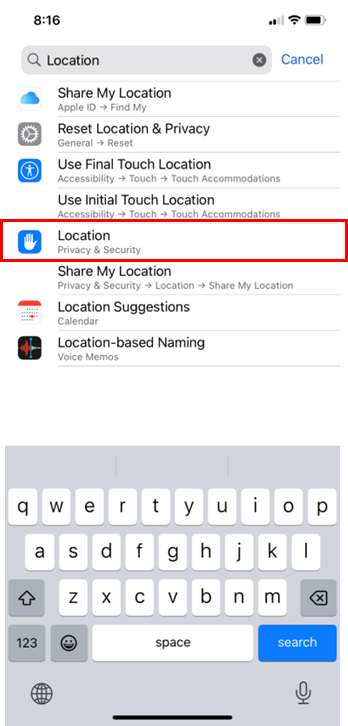
- Search 'Locations' in the search bar.
-
Select 'Locations, Privacy and Security'.
-
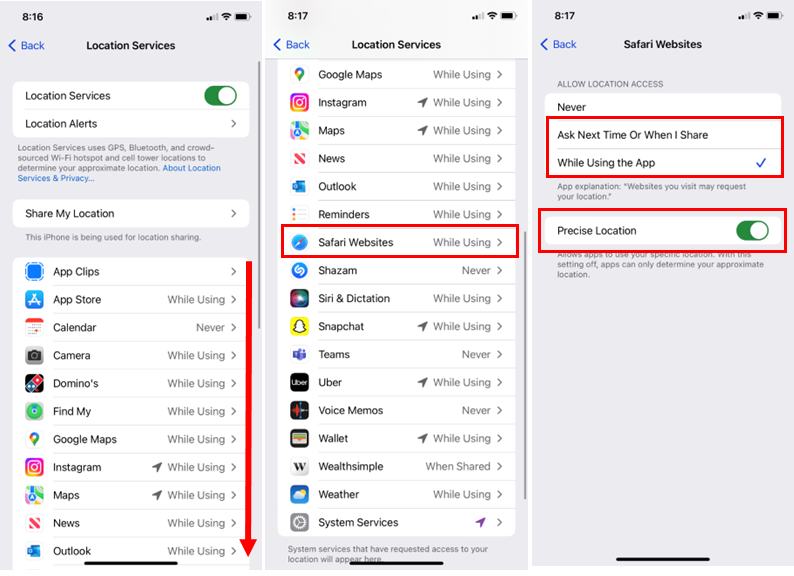
Once you are on the Location Services page, scroll down to “Safari Websites”.
- Select either:
- “Ask Next Time” or “When I Share”
- “While Using the App”
-
Ensure ‘Precise Location” is ON for best experience.
HOME - Booking a Load
The following outlines the necessary steps required for a driver to carry out their own booking through the Web-App. This feature is ONLY allowed to be performed by a driver with dispatcher approval.
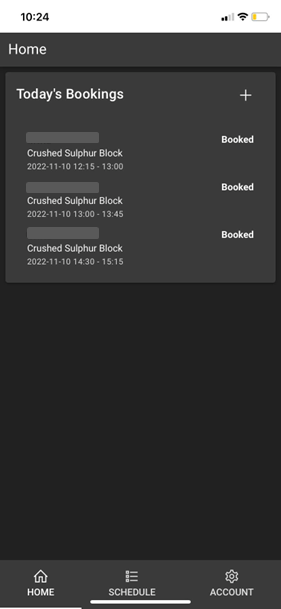
- Once you are logged into the app, have the “Home” tab open.
-
On the “Home tab”, select the (+) plus button in the top right corner besides "Today’s Bookings".
-
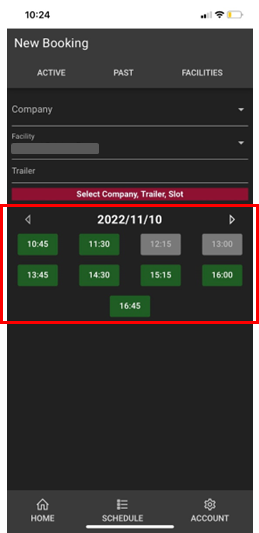
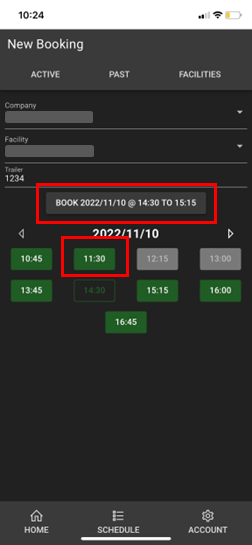
On the “New Booking” page, you can view the current times available for booking.
Select and enter all the details for the booking.
Most facilities require that you enter the booking type (load/unload) details; such as the Company you are associated with, the facility, from/to LSD, density and volume of the product, and your truck/trailer details.
-
Once you have completed inputting the booking information, you'll be able to select “Book” the time they wish to arrive at site for.
SCHEDULE - Booking a Load
-
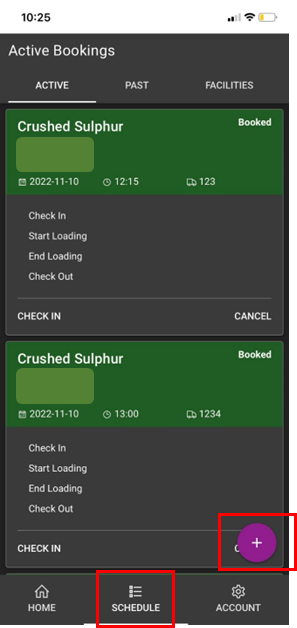
Another method to book a load within the Schedule page is by selecting the (+) plus button (located at the bottom right):
FACILITIES - Available and Facility Information
-
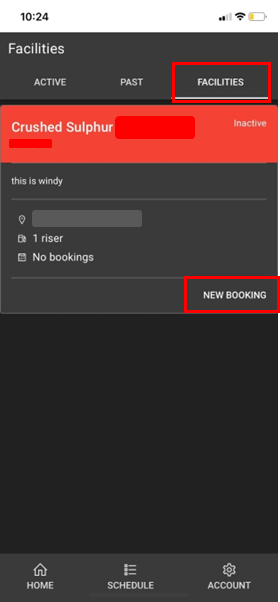
Within this menu, you'll be able to view all the facilities you have access to.
-
From here, you're able to select "New Booking" and simply follow the steps above to book a load.
SCHEDULE - Cancelling a Load
NOTE: This feature is ONLY allowed to be performed by a driver with dispatcher approval.
-
While on the app, follow any of the above steps to find your booking.
-
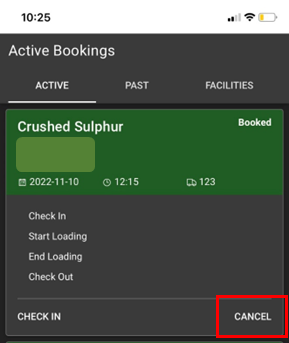
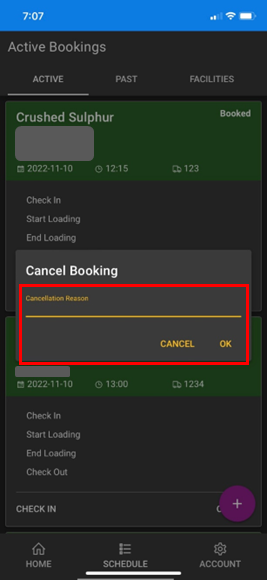
Once you have found your booking select the “cancel” button.
-
This will bring up a prompt asking to provide a reason for the cancellation. Once that is filled out, select “OK”.
ACTIVE BOOKING - Checking In & Loading Process
The following steps are for the proper procedures upon arrival a facility.
They allow for accurate reporting; help improve accountability and provide real-time information.
-
Once you have arrived at site, open the Truck Scheduling app.
-
After opening the app, find your booked time slot you have arrived for.
-
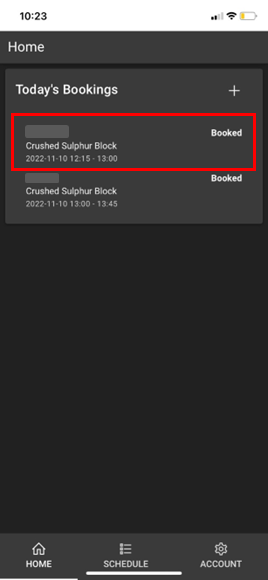
On the home page, under “Today’s Bookings”, click on the slot you have been scheduled for to pull up the check-in menu.
-
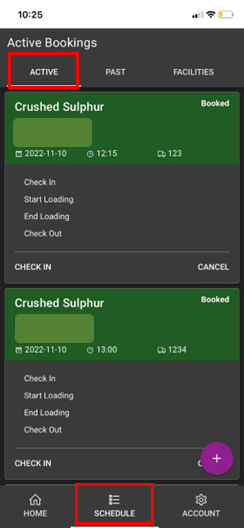
Go to the “Schedule” tab to view “Active Bookings” to view the check-in feature.
-
-
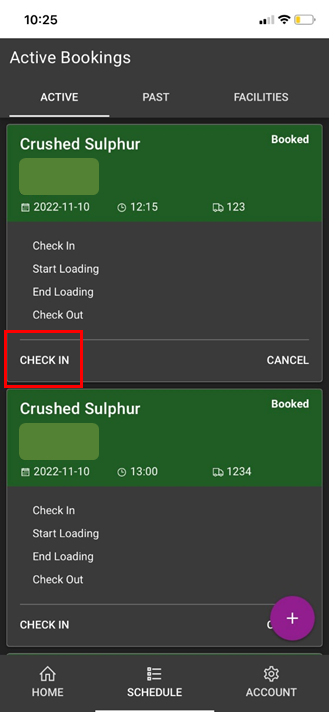
Once you have found your booking, select “Check In”.
-
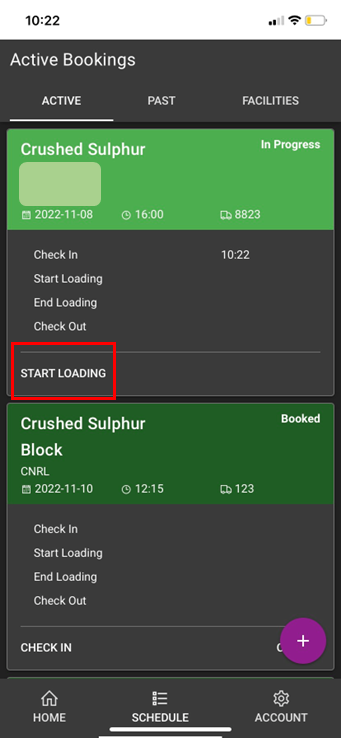
Once you are about to begin your load, select “Start Loading”.
-
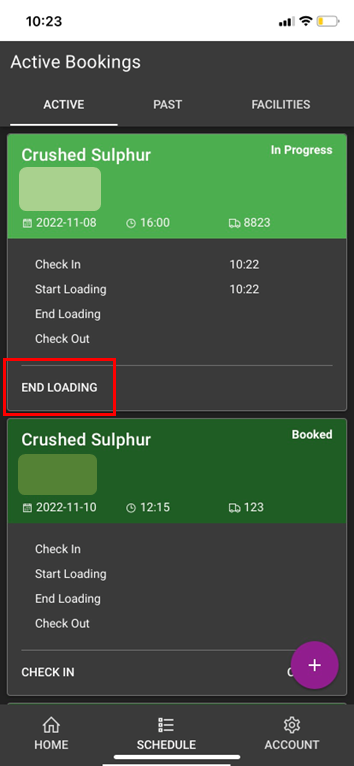
Once both your lead and pup have been loaded, select “End Loading”.
-
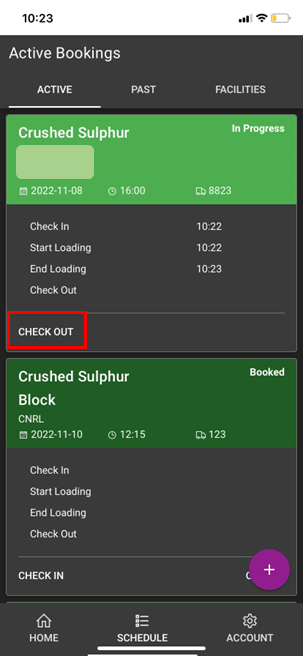
When you are about to leave the site, select “Check Out”.
-
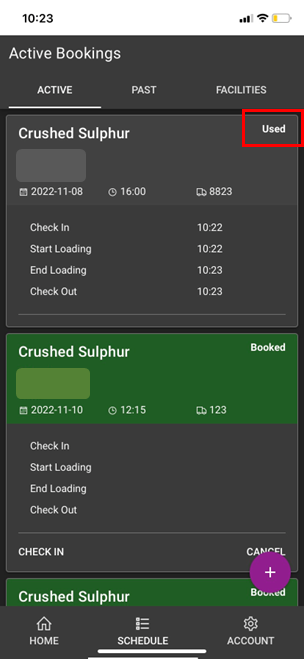
This ensures the workflow is closed and the system knows the booking has been fulfilled and will be seen as “Used”.
-